
Welcome to the Epiphany Crafts and Clearsnap HALLOWEEN Blog Hop!
All week long we'll be bringing you the spookiest, scariest, and most magical Halloween design ideas featuring Epiphany Crafts and Clearsnap products. We've mixed in a few fun projects to hopefully inspire you the remainder of the days!
Today we have projects from Designers Audrey Pettit and Linda Auclair!
Fright Night Boo Ghost
Designer: Audrey Pettit
Supplies:
Epiphany Crafts Shape Studio Tool Round 14
Epiphany Crafts Round 14 Caps
Epiphany Crafts Shape Studio Tool Heart 20
Epiphany Crafts Heart 20 Caps
Clearsnap Mixed Media Inx
Clearsnap Top Boss Embossing Ink
Clearsnap Top Boss White Embossing Powder
Clearsnap Clear Design Adhesives
Clearsnap Fairy Dust Glitter
Clearsnap Glue Gloss
Clearsnap Round Stylus Tips
Adhesives: Glue Arts Glue Glider Pro with High Tac Adhesive, Glue Arts Extreme Adhesive Squares,
and Glue Arts U Cut It Foam Adhesive
Cardstock: Bazzill
Patterned Paper: American Crafts and Target $ Spot
Chipboard Alpha: American Crafts
Designer Pins and Picks: Pink Paislee
Chipboard Banner: Jenni Bowlin
Alpha Stamps: Hero Arts
Trim: K&Co. and The Kraft Outlet
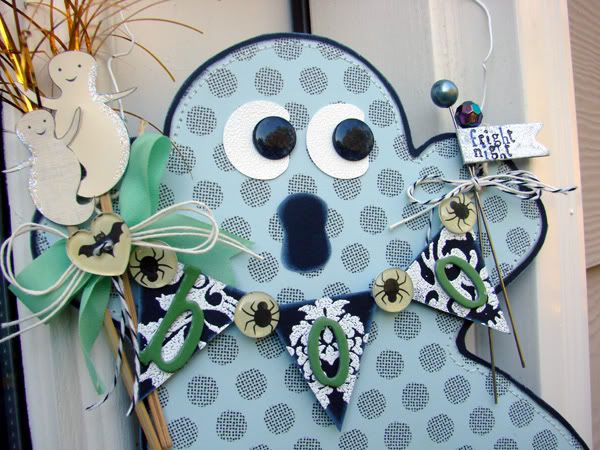
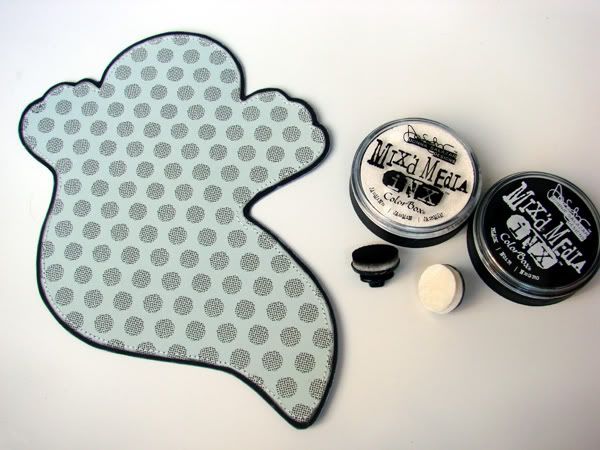
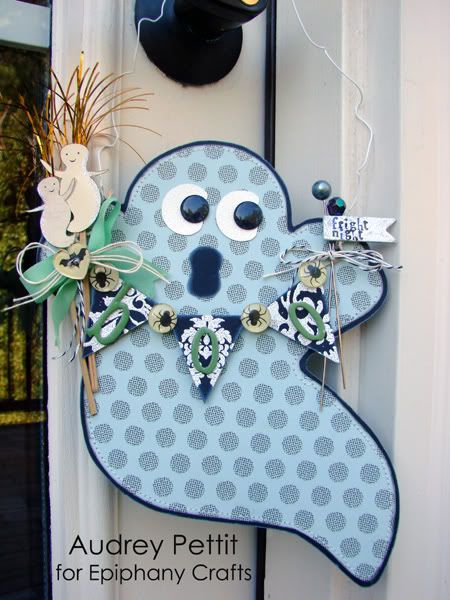
1. Die cut or free-hand cut a ghost shape from patterned paper. Edge with Black Mixed Media Inx and stitch to a piece of black cardstock. Trim around the ghost shape, leaving approximately a 1/8" border. Edge black cardstock with Jasmine Mixed Media Inx.
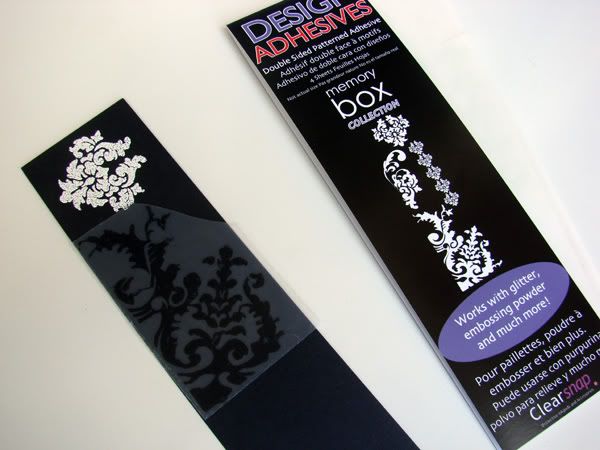
2. To create the banner, first emboss a scrap of black cardstock with Clearsnap's Design Adhesives and Top Boss White Embossing Powder. The Design Adhesives work just like rub-ons. Simply cut out your desired design, rub it on like you would a typical rub-on, peel up the clear liner, and emboss, add glitter, foil, flock, whatever you wish.
3. Cut 3 triangles from embossed cardstock for the banner. My triangles are about 1.5" wide by 1.75" long. Swag string across the ghost shape, and attach the banners using Glue Arts U Cut It Foam adhesive.
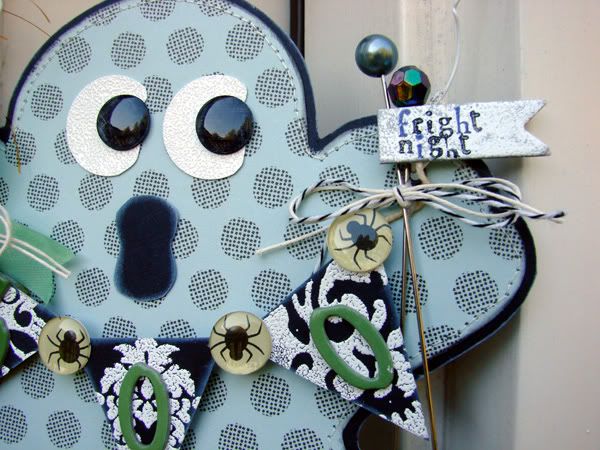
4. Embellish banner with trims, chipboard alpha stickers, designer pins and picks. Create bubble caps using the Epiphany Crafts Round 14 Studio Tool and Round 14 caps to place between each banner flag. Create a heart button using the Epiphany Crafts Heart 20 Studio Tool and a Heart 20 Cap to embellish the top of the bow.
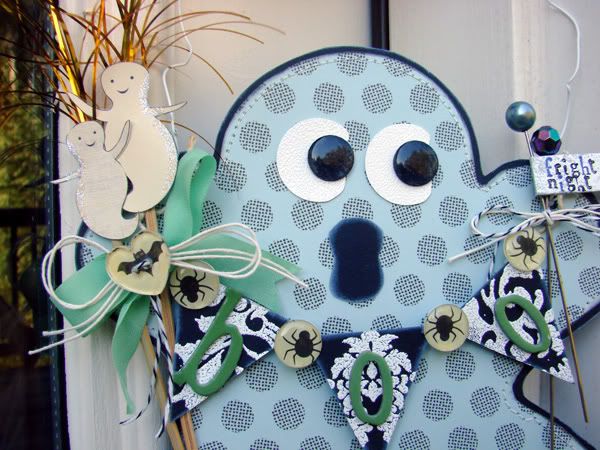
5. For the eyes, emboss a scrap of white cardstock with Top Boss Embossing Ink and Top Boss White Embossing Powder. Punch two 1" circles from embossed paper and cut into lima bean shapes. Create two black rounds using the Round 14 Studio Tool and Round 14 Caps for the pupils.
6. For the mouth, punch a 1" circle from black cardstock and cut into a figure 8 shape. Edge with Jasmine Mixed Media Inx and adhere to the ghost using Glue Arts Extreme Adhesive Squares.
7. Emboss a chipboard flag with Top Boss White Embossing Powder and stamp a sentiment with small alpha stamps. Adhere to the designer pins using Glue Arts U Cut It Foam adhesive.
8. Cut two ghosts from patterned paper. Apply Fairy Dust Glitter to the edges of the ghosts using Clearsnap's Glue Gloss. Adhere ghosts to the Designer Picks.
9. Hang ghost from a wire hanger and enjoy!
Cardstock: Bazzill
Patterned Paper: American Crafts and Target $ Spot
Chipboard Alpha: American Crafts
Designer Pins and Picks: Pink Paislee
Chipboard Banner: Jenni Bowlin
Alpha Stamps: Hero Arts
Trim: K&Co. and The Kraft Outlet


1. Die cut or free-hand cut a ghost shape from patterned paper. Edge with Black Mixed Media Inx and stitch to a piece of black cardstock. Trim around the ghost shape, leaving approximately a 1/8" border. Edge black cardstock with Jasmine Mixed Media Inx.

2. To create the banner, first emboss a scrap of black cardstock with Clearsnap's Design Adhesives and Top Boss White Embossing Powder. The Design Adhesives work just like rub-ons. Simply cut out your desired design, rub it on like you would a typical rub-on, peel up the clear liner, and emboss, add glitter, foil, flock, whatever you wish.

3. Cut 3 triangles from embossed cardstock for the banner. My triangles are about 1.5" wide by 1.75" long. Swag string across the ghost shape, and attach the banners using Glue Arts U Cut It Foam adhesive.
4. Embellish banner with trims, chipboard alpha stickers, designer pins and picks. Create bubble caps using the Epiphany Crafts Round 14 Studio Tool and Round 14 caps to place between each banner flag. Create a heart button using the Epiphany Crafts Heart 20 Studio Tool and a Heart 20 Cap to embellish the top of the bow.

5. For the eyes, emboss a scrap of white cardstock with Top Boss Embossing Ink and Top Boss White Embossing Powder. Punch two 1" circles from embossed paper and cut into lima bean shapes. Create two black rounds using the Round 14 Studio Tool and Round 14 Caps for the pupils.
6. For the mouth, punch a 1" circle from black cardstock and cut into a figure 8 shape. Edge with Jasmine Mixed Media Inx and adhere to the ghost using Glue Arts Extreme Adhesive Squares.
7. Emboss a chipboard flag with Top Boss White Embossing Powder and stamp a sentiment with small alpha stamps. Adhere to the designer pins using Glue Arts U Cut It Foam adhesive.
8. Cut two ghosts from patterned paper. Apply Fairy Dust Glitter to the edges of the ghosts using Clearsnap's Glue Gloss. Adhere ghosts to the Designer Picks.
9. Hang ghost from a wire hanger and enjoy!
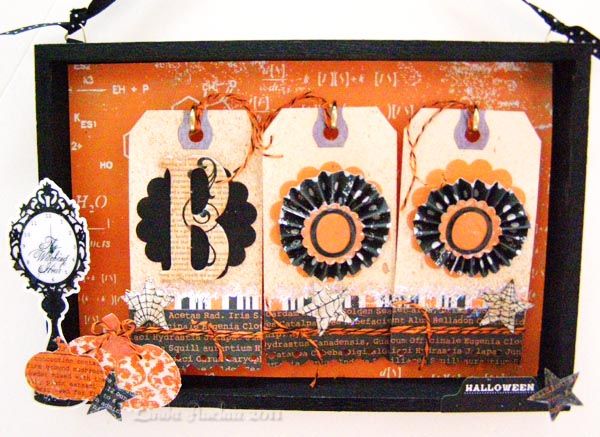
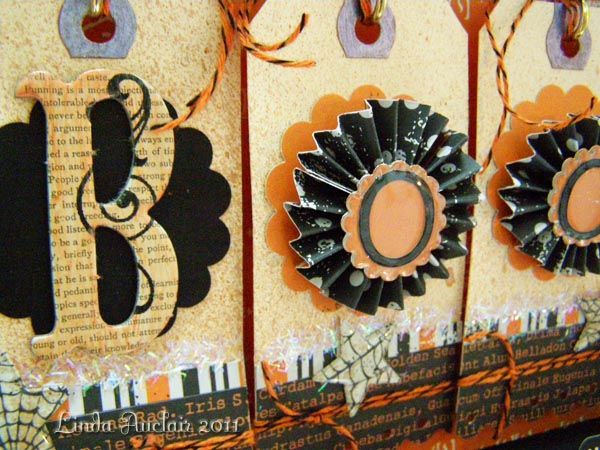
BOO Wall Hanging
Designer: Linda Auclair
Epiphany Crafts Supplies:
EC Scalloped Circle 25 and Star 25 shapes
Other Supplies:
Clearsnap Smooch ink in "Sweet Melon"
Clearsnap Smooch Spritz in "Pralines & Cream"
Clearsnap Sparkle Fibers in "Snowdrift" for tags
Did we mention we have "candy"?
Blog Candy! (the best kind truly!!)
Be sure to to hop over to the Clearsnap blog for more ideas and ways to win!!


What a darling ghost and wall hanging! Great details on the projects! Clearsnap and Epiphany Crafts make a great pair!
ReplyDeleteDeniseB
A very cute ghost!! Love it! Also thanks to the chance to win this awesome prize :)
ReplyDeleteI love the wall hanging!! Thanks for the chance to win some Candy!! :D
ReplyDeleteThose are really cool projects. Thanks for a chance to win some of your fabulous products. That sure would be a treat!
ReplyDeleteLove your projects.
ReplyDeleteThe boo tags are really cute. I would like to make that for myself. I LOVE LOVE LOVE Halloween!!
ReplyDeleteWhat fun projects!
ReplyDeleteOk that ghost is super cute!I love the Design Adhesives....I remember when I first saw them I just had to buy them! What a darling design. And the wall hanging is stunning. I love the use of the tags with the stars and twine...what a great home decor project! Thanks for sharing
ReplyDelete*gina* scrappinology@live.com
A bootiful little ghost. Now that kind of Halloween decor I love.
ReplyDeleteLOVE LOVE LOVE the ghost, and am always looking for ways to use design adhesives. Thanks!
ReplyDeletehow fabulous are these! That ghost wall hanging is awesome! I love all the details! The BOO wall hanging is great too! Such fun decorations! Thanks for sharing.
ReplyDeleteI have shared the hop on my FB page!
Tammy
tampatha01@gmail.com
Awesome projects today! Love the wall hangings.
ReplyDeletelove the projects! especially that ghost.
ReplyDeleteSuch an adorable ghost! Love its eyes and banner! Really cute!
ReplyDeleteFreakin' over 2day's projects! Luv, luv, luv the Ghost w/ Boo banner! Following via GFC! Thanx~prhmangel at gmail dot com
ReplyDeleteOMGosh, LOVE that Ghost! :)
ReplyDeleteLoriM
Really like the ghost with banner, a great door hanger or inside on any wall. The Boo wall hanging is wonderful, love the tags for the spelling, great dimension. thank you for sharing and a chance to win.
ReplyDeleteOh so darling!
ReplyDeleteLove the ghost, it so cute. More inspiration for me to play with! :)
ReplyDeleteI love the ghost. Thanks for the chance to win!
ReplyDeleteThese are so cute. LOVE both of these projects. Can't pick a favorite.
ReplyDeleteI like the banner and the spiders.
ReplyDeleteOooh . . . more cute projects! I really LOVE the ghost and the use of the mixed media inx, which I never saw before.
ReplyDeleteThose are really cool projects. Thanks for a chance to win some of your fabulous products. That sure would be a treat!
ReplyDeleteKisses.
Such great projects!! TFS
ReplyDeleteIncredible projects!!!!!
ReplyDeletegreat project. thank you for sharing.
ReplyDeleteBoth Home Decor projects are creative and amazing today. I am excited to give them a try!
ReplyDeletelove love love these projects!!!
ReplyDeleteGreat projects! Thanks for the inspiration!
ReplyDeleteOh my goodness! Please add me in! Audrey is wonderful!
ReplyDeletelove love both projects!
ReplyDeleteLove the Boo wall hanging! Found your blog via the Echo Park's fb photos. So glad I discovered two more blogs with lots of inspiration!
ReplyDeleteWow, I just love that little ghost, so cute...
ReplyDeleteThe ghost projects is so creative and amazing!!
ReplyDeleteLove it!!
Love the framed project too!!
I love todays projects! I love that cute ghost (love the heart with the bat in it on the bow), and the banner you made. And the boo tags are so cool, what an awesome wall hanging, very inspirational!
ReplyDeleteKatie B.